Thursday, June 28, 2012

So Ready For A Long Weekend!

Heads up, this is my last post for this week. I am taking tomorrow off and heading up north for a long weekend! My cousin, Kevin and my Aunt Kathy from California are flying in for the weekend! I am so excited to see them and to spend some quality time relaxing at our cottage. My sister and I are heading up later today to meet up with everyone, and I am just getting more and more excited as I am packing.

The essentials; body and face sunscreens, magazines, some spicy new books,
a cute straw beach bag, and a festive sun hat.

Packing my Estee Lauder Bronze Goddess, it's a great summery, fresh fragrance!

Busting out my new Nine West Wedges!

Sticking to my summer check list and actually 
wearing some of my fun, summery jewelry!

Now I just need to pack some clothes and bathing suits... which sounds misleadingly uncomplicated. Thankfully I do not have to pick out too many outfits since I plan to spend almost the entire time in my PJ's or swim suits. I cannot wait to throw the rest of my stuff in a bag and hit the road! Woohoo long weekends! 7 people, 3 dogs, 1 cat, and 1 cottage with 3 bedrooms. It's going to be a fun weekend! Can't wait to share next week!

Wednesday, June 27, 2012

Jack Rogers Love

My love for Jack Rogers has only grown over time. I cannot even remember my life before Jack Rogers. This is probably because I got my first pair in grade school. You can tell that I not only love the way they look, but these are shoes that I actually wear because they look worn. Ok, maybe they look a little gross, but let's just call them well loved.

Black Jack Rogers

Gold Jack Rogers (OPI Nail Polish in I'm India Mood for Love)

These are my favorite two pairs of Jack Rogers. I have several others, but they are even more loved if you catch my drift. I literally wear my Jacks with everything from shorts and a polo to a cocktail dress. They are the perfect classy touch to any summer ensemble and I adore them! Not to mention they come in every color! I have been crushing on these babies, http://www.jackrogersusa.com/shoes/sandals/rio-navajo They may be my next Jack Rogers purchase.

Tuesday, June 26, 2012

Cucumber Sandwiches

No, I am not talking about the cucumber sandwiches you chow down at tea parties. Not that those aren't fabulous, but this time I mean literally putting lunch meat and cheese on cucumber slices. I saw this idea on Pinterest as a low carb sandwich option, and just had to give them a try. They are fabulous!!!

Yummy Lunch!

Boar's Head Salsalito Turkey with Swiss or Cheddar on Cucumber Slices and Pretzels

These are so fresh, yummy, and perfect for a nice snack or light meal. I highly recommend giving them a try this summer! I personally think these would be just as cute as traditional cucumber sandwiches on a silver platter for as hors d'oeuvres.

Monday, June 25, 2012

Pool Party

I spent this past weekend relaxing. It was very much needed and appreciated! Saturday morning, Josh and I were volunteering at Gleaners, a local food bank in Detroit. Our group of volunteers got a lot of food packaged, and it was a really good start to the weekend. If you are in the area and interested in volunteering, check them out to see how you can help! (http://www.gcfb.org/site/PageServer?pagename=pg_volunteer) After Gleaners, we ran a couple of errands around Grosse Pointe and ran into this beauty:

Ford GT

We spent the rest of the day and night at a friend's house in Rochester, swimming, having a couple drinks, grilling, and just hanging out. It was a blast! Our friend, Rosa, taught me how to make some amazing mojitos!

Beautiful backyard with the most amazing salt water pool, perfect place to spend a gorgeous afternoon.

Cutest succulent next to the grill.

The most incredible strawberry mojitos!

This gem was on the outside of the pool house right behind the diving board. LOVE IT!

This is where we spent the entire afternoon/evening. 
I adore that padded circular double lounge!


We had the best dinner, and it tasted amazing after the afternoon swimming!

Now, about those strawberry mojitos...I was so impressed that I thought I would share the recipe.


You Will Need:
A Large Pitcher
Ice
Bacardi Rum
Sugar
Fresh Mint Leaves
A Container of Strawberries
Two or Three Limes
A Can of Fresca (You can use some sparkling water or sprite instead.)

First go ahead and cut the limes into quarter wedges and cut the strawberries into slices.
Take the strawberry slices and put them into a bowl,
and go ahead and mush them with the back of a fork to get a lot of the juices out.
Then you need to put some ice into the pitcher.
Pour about a cup of sugar over the ice.
Then squeeze your two or three limes (the more you like lime, the more you can put in) over the ice.
Go ahead and tear up lots of mint leaves and add those to the pitcher.
Next pour your mushed strawberries and strawberry juice into the pitcher.
Last, but certainly not least, pour in your Fresca and Rum!
Stir and serve!
If you will be out by the pool, I recommend serving on ice
to keep it nice and cold while you're swimming.

There really is no way to mess this recipe up! 
You can play with the portions and make it to your liking.
Josh and I are thinking of trying it in a blender for frozen ones next time.
I'll let you know how it goes!

Happy Monday!

Friday, June 22, 2012

Wavy Hair By Kelsey

Just in time for the weekend, I have a tutorial for fun, wavy hair! My friend Kelsey is seriously talented with hair and she was nice enough to show me how she created her wavy look. Kelsey uses a one inch curling iron, sections out pieces of hair, and wraps each piece around the barrel, wrapping away from her face. Check out the photos below to see how she does it!

Take sections of hair and curl them piece by piece around your head.
If you have long, thick hair like Kelsey and I, you can separate 
your hair into small sections.

Take each chunk of hair and wrap it around the curling iron barrel away from your face without using the clamp. 
Kelsey holds onto the end of the section of hair and 
pulls it around the barrel as it gets closer to her head.


Once you've got the entire section of hair wrapped around the barrel, 
hold the end with the tip of the curling iron for a couple seconds to let the curl set.

Hank was loving watching Kelsey do her hair!

Finish up curling your way around your head, and then give it a healthy dose of hair spray.


I had to show both her beautiful hair and cute top!

Fair warning, this look does take a little practice. It is a little tough to get the hang of wrapping the chunk of hair around the barrel without starting at the bottom of the section of hair, but once you try it on a couple sections it gets a lot easier. This is a perfect look for a summer night out and it looks great the next day too! I would love to hear any different takes or tips on how to create fun, wavy looks like Kelsey's!

Have a fabulous weekend!

Thursday, June 21, 2012

Glazed Salmon Deliciousness

So I know I promised a fabulous salmon recipe last week, but I just did not get the post together before the end of the week. I finally got around to loading the photos and typing up the recipe, so here we go! Josh and I got a two pound filet of salmon, which was a lot of food! If you want to just make enough for two people you could get just a single pound filet and cut the recipe in half. This dish is really really good and it's just as good the next day cold or reheated, so I think it's worth it to make a lot and enjoy the leftovers!


You Will Need:
A Filet of Salmon (This recipe is for a two pound filet.)
1/2 Cup of Maple Syrup
4 Tablespoons of Soy Sauce
A Couple Cloves of Garlic
1/2 Teaspoon of Garlic Salt
1/4 Teaspoon of Pepper
Some Fresh Chunks of Pineapple (The canned pineapple works too!)
2 Bags of Whole Grain Rice (The bag rice is just soooo easy to make and pretty much fool proof.)

Take a large pyrex and spray it with cooking spray. Place the salmon skin down into the pyrex.

Mince 2 or 3 cloves of fresh garlic. 
I used a little bit more because Josh and I LOVE garlic!

Mix the Maple Syrup, 
Soy Sauce, 
Minced Garlic,
Garlic Salt,
and Pepper.

Take your mixture and pour it over the top of the salmon filet.
Now you are going to take your chunks of pineapple and place them over top of the salmon.
Then you will go ahead and spoon the juices in the pyrex 
and pour it over each of the pineapple chunks.

Stick the pyrex into the fridge for about a half hour. Every 10 minutes or so, 
go ahead and spoon more of the liquid over the top of the salmon filet and pineapples.

Preheat the oven to 400 degrees, and once it is ready, 
go ahead and stick the salmon in the oven for about 30-40 minutes 
depending on the thickness of the filet.
After the salmon has been in the oven for about 15-20 minutes, 
go ahead and boil some water and place the bags of rice in the boiling water.
The rice will normally take 10-12 minutes.
Hopefully you will have good timing and the rice will be done just before the salmon.
You will know the salmon is fully cooked with it is flaky and light pink in the middle.
Spoon some more of the warm liquid mixture in the bottom of the pyrex 
over top of the salmon one last time.

Go ahead and plate and serve! It is delicious!


YUM!

In true Scully fashion, I served fabulous fresh berries and whipped cream for dessert!


Wednesday, June 20, 2012

Juicy Apple

My obsession with lip glosses has been very well documented here on Shoes and Red Velvet Cupcakes. I feel like you always have to be prepared for running into your future husband, future employer, or photographs. I've found one of the best ways to be prepared, is to always be armed with a lip gloss! ALWAYS! I am never without a lip gloss, and normally carry my latest favorite. I am the girl that will not be in a picture unless I've got a fresh coat of gloss. This does tend to drive people crazy occasionally...


My latest lip gloss obsession is this Clinique one in Juicy Apple. It looks a little on the scary bright side when you just look at the tube, but it goes on very sheer and adds the perfect pop of lip color! I originally picked this lip gloss up for my mother as part of her Mother's Day gift, and loved it so much that I had to pick one up for myself.

Clinique Long Last Glosswear in Juicy Apple


Tuesday, June 19, 2012

No Bake Strawberry Pie

My Dad's mother used to make a cold strawberry pie with graham cracker crust and whipped cream. He absolutely raves about those pies, so my sister and I have been trying to recreate it for years! Unfortunately she is not around to ask, so we have been trying to make one without much success pretty much every Father's Day. After scouring the web for all different recipes and a little, (read A LOT) of trial and error, I got a good one! This pie tastes soooooo good, it's perfect for summer, and it is really simple!


What You Will Need:
A Pre-Made Graham Cracker Crust (Trust me on this one, they are really hard to make from scratch.)
Corn Starch
Sugar
Water
One Small Package of Strawberry Jello
LOTS of Strawberries
One Container of Cool Whip

First rinse and cut up lots of strawberries. I used a little more than 2 packages, 
but it depends on the size of the berries. The ones I used were pretty big, 
so you may need more if you get small ones. 
Cut them length wise and separate the end slices from the center ones.


Then take the ends of the strawberries and place them skin down on the bottom of the pie crust.
Doing this keeps the bottom of the crust from getting coated in the gelatin and getting soggy.


Now you are going to go ahead and layer in slices of strawberries. 
Make sure to place them in rings around the exterior and work your way into the center of the pie. 
Try to stack a little higher in the center so that it kind of has a peak in the middle. 
The tighter you pack in the strawberries the fewer pockets of strawberry Jello. 
I prefer to tightly pack the strawberries and minimize the gelatin areas. 
I like to have the gelatin be more of a glaze to hold it all together.
If you love Jello, or you are too impatient to individually place strawberry slices, throw them in there!


Once you have the strawberries in there, go ahead and mix:
a cup and a half of water,
a cup and a quarter of sugar,
and three tablespoons of corn starch in a sauce pan.


Once you've got those three ingredients mixed, place the sauce pan on high heat and stir until it boils.
You will see some bubbling around the edges to start, but wait for bubbles in the middle. 
You will see and feel the mixture thicken substantially and it will happen quickly.
Once you've got a thick, bubbling mixture, turn off the heat and stir it to cool it down a bit.
Then go ahead and stir in the packet of Jello.


Now that you've got some thick strawberry goo, go ahead and pour it over top of the strawberries.
Try to coat all of the berries on top, while moving all over the surface and 
letting it get down into the cracks between the berries.


Next you are going to carefully lift your pie, and it will be heavy, 
and stick it in the fridge for 5-6 hours.
You will know it has chilled long enough when you touch some of the Jello on top 
and it does not stick to your finger.
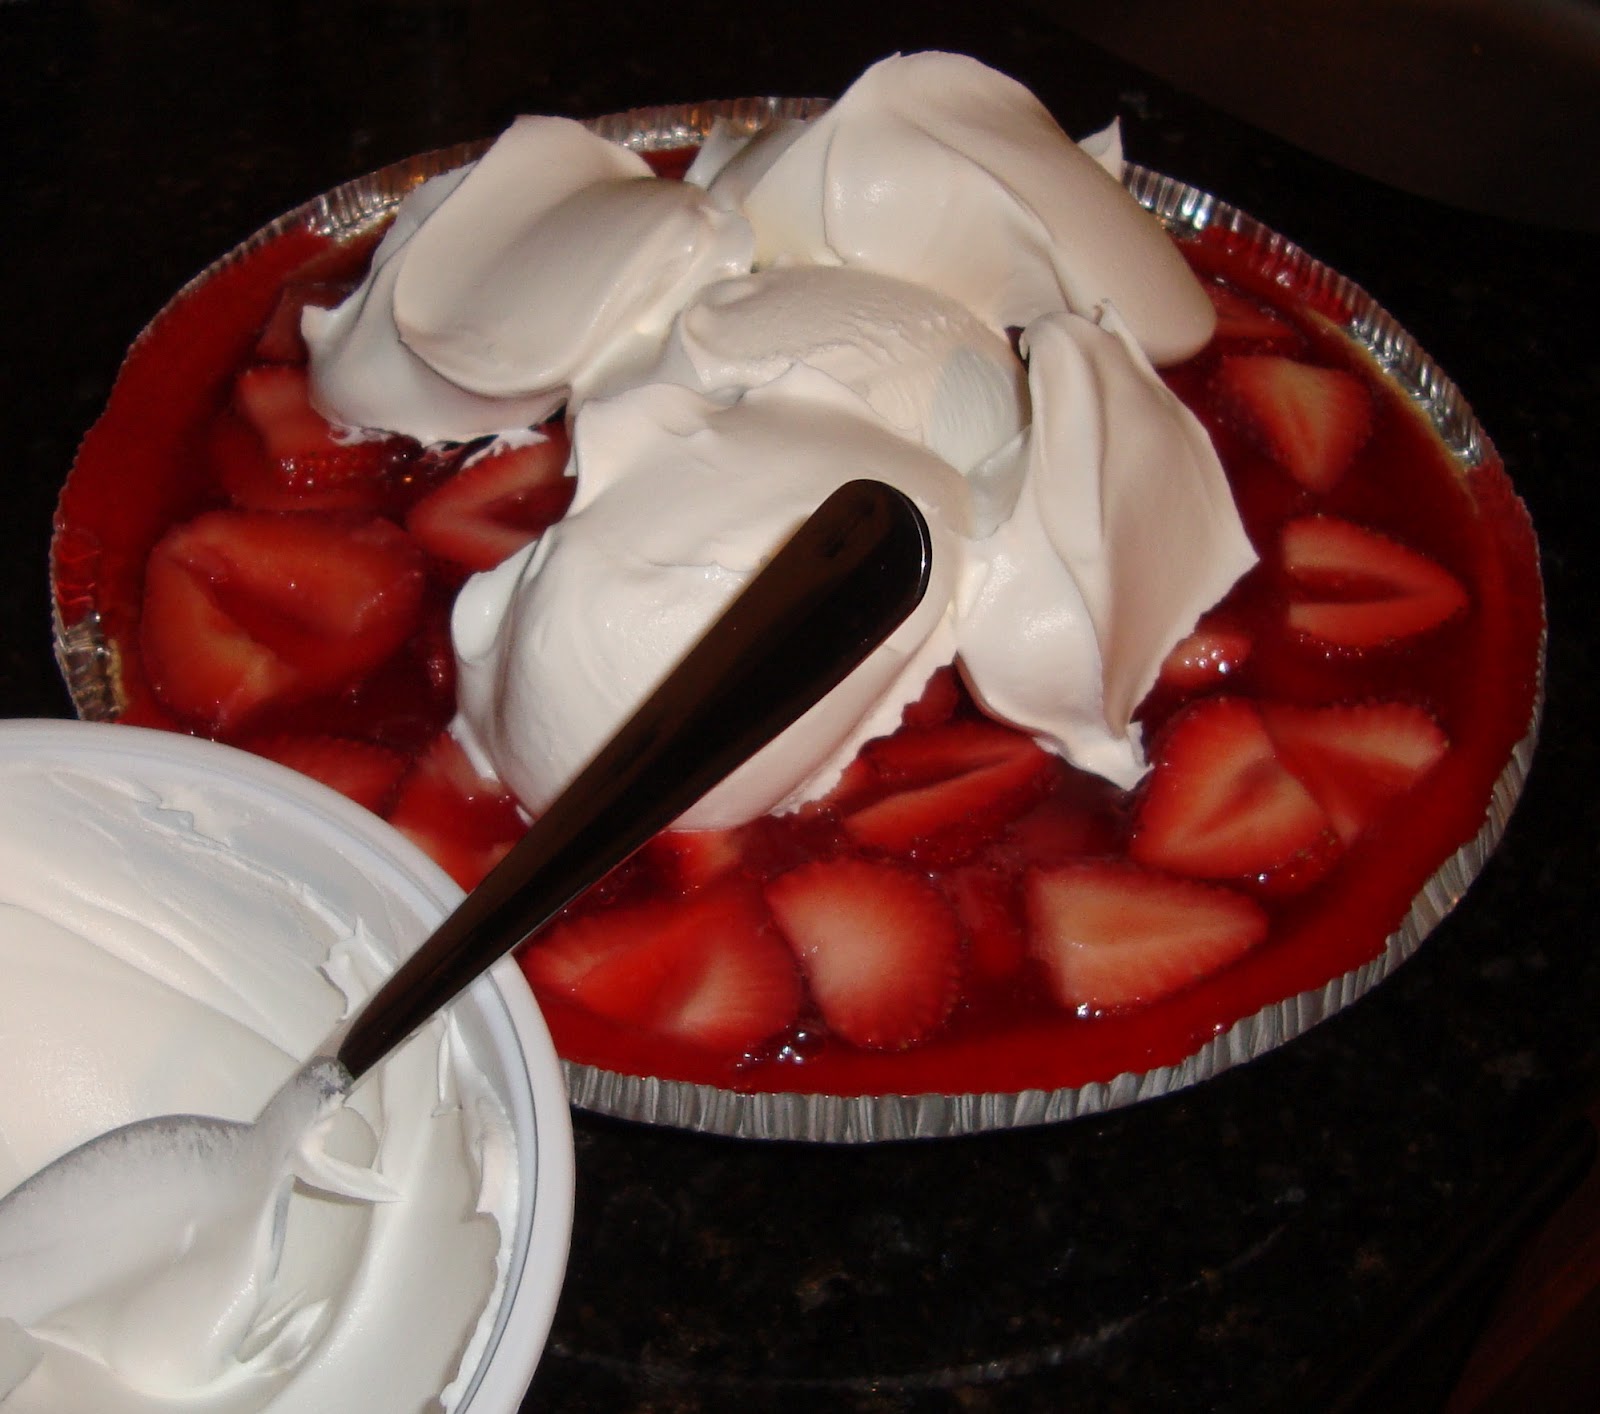
 Then you got to glob on some cool whip and spread it across the top.
You can add a nice fanned out strawberry on top to make it look pretty!
Josh and I were too anxious to taste it, so I forgot the strawberry garnish on top.